
By Texas Heart CPR Training Instructor Team, American Heart Association Aligned Training Site · · 9 min read
What Are the 7 Steps of CPR? A Step-by-Step Guide
What are the 7 steps of CPR? Learn the exact sequence from AHA-certified instructors, why hands-on practice matters, and how to get certified in DFW.

The 7 steps of CPR are a sequence of actions that can double or triple the chance of survival from an out-of-hospital cardiac arrest. The steps are: assess the scene and the person, call 911, open the airway, check for breathing, perform chest compressions, give rescue breaths, and continue until help arrives. We teach this exact sequence in our hands-on classes across Plano, Dallas, and Fort Worth, using PRESTAN feedback manikins so students learn what real compressions feel like.
You have probably seen CPR in a movie or a workplace video. The reality is different, because the person who needs CPR is usually someone you know. Most out-of-hospital cardiac arrests happen at home, so the person giving CPR is often family. We agree that CPR can feel intimidating the first time. By the end of this guide, you will know the 7 steps in order, why each one matters, and how hands-on practice turns knowledge into action.
Key Takeaways- The 7 steps of CPR are: assess the scene, call 911, open the airway, check breathing, give compressions, give rescue breaths, and continue until help arrives.- Immediate CPR can double or triple the chance of survival from an out-of-hospital cardiac arrest.- Only 40.2% of out-of-hospital cardiac arrest victims receive bystander CPR.- Texas Heart CPR Training has taught hands-on CPR classes in DFW since 2009, with same-day eCards valid for two years.- AED training is included in every CPR certification class we offer.
What Are the 7 Steps of CPR?
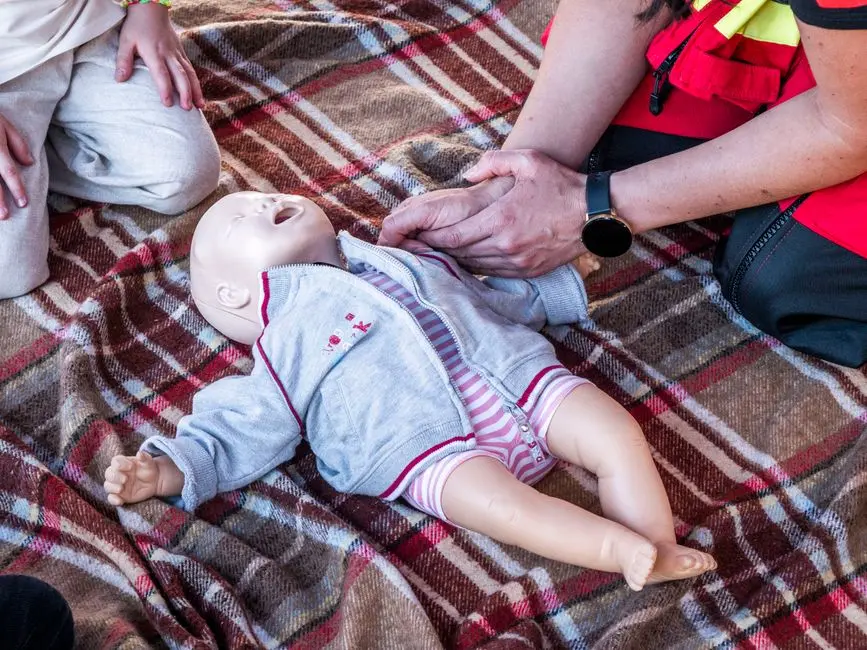
The American Heart Association sets the standard for CPR in the United States. The 7 steps below follow that standard, and they are the same steps we coach in every class at our Plano training center. Here is the sequence in order:
- Assess the scene and the person. Make sure the area is safe, then tap the person and shout to check for responsiveness.
- Call 911. If the person is unresponsive, call 911 immediately and ask someone to find an AED.
- Open the airway. Tilt the head back and lift the chin to open the airway.
- Check for breathing. Look, listen, and feel for normal breathing for no more than 10 seconds.
- Perform chest compressions. Push hard and fast in the center of the chest, at least 2 inches deep and 100 to 120 compressions per minute.
- Give rescue breaths. Give two breaths after every 30 compressions, each lasting about one second.
- Continue CPR until help arrives. Keep going until an AED is ready, emergency responders take over, or the person starts breathing normally.
The numbers behind this matter. More than 350,000 out-of-hospital cardiac arrests happen in the US each year. Yet only 40.2% of those victims receive bystander CPR. The gap is not a lack of willingness. It is a lack of confidence. People freeze because they are not sure they remember the steps. Hands-on practice fixes that.
Step 1: Assess the Scene and the Person
Before you touch anyone, look around. Is there traffic, fire, water, or exposed electrical wires? If the scene is unsafe, do not become a second victim. Once the scene is safe, tap the person firmly on the shoulder and shout, "Are you okay?"
If there is no response, the person needs help. This first step takes seconds, but it sets up everything else. Our instructor team has taught this sequence since 2009, and we drill the scene check first because it is the step people skip when they panic. A quick scan and a firm tap are simple, but they prevent you from starting CPR on someone who is just asleep or drunk.
Step 2: Call 911
Call 911 before you start compressions. If you are alone, put the phone on speaker and set it down so you can work while you talk to the dispatcher. If someone else is nearby, point at that person and tell them to call 911 and bring an AED. Do not ask generally. Assign the task to one person.
The dispatcher will stay on the line and talk you through the steps. That is fine. You are not alone in this. The AED is the other critical piece. An AED can shock the heart back into a normal rhythm, and using one early improves survival. AED training is included in every CPR certification class at Texas Heart CPR Training, because the machine only helps if you know how to turn it on and follow the voice prompts.
Step 3: Open the Airway
A person who is unresponsive often has a blocked airway. The tongue falls back and covers the throat. The fix is the head-tilt, chin-lift maneuver. Place one hand on the forehead and gently tilt the head back. Use the fingers of your other hand to lift the chin. This moves the tongue away from the airway.
Our American Heart Association and ASHI certified instructors teach this move on every student, every class. It looks simple on paper, but the angle matters. Too little tilt and the airway stays closed. Too much force on a small child and you can do harm. Practice on a manikin is the only way to feel the correct position.
Step 4: Check for Breathing
With the airway open, put your ear near the person's mouth. Look at the chest, listen for breath sounds, and feel for air on your cheek. Do this for no more than 10 seconds. You are checking for normal breathing, not gasping. Occasional gasps are not normal breathing and do not count.
If the person is not breathing normally, start compressions. Do not waste time looking for a pulse. In our classes, we teach students to skip the pulse check and move straight to compressions when breathing is absent. The reason is simple: a pulse check under stress is unreliable, and every second without compressions reduces the chance of survival. No breathing, start pushing.
Step 5: Perform Chest Compressions
Compressions are the heart of CPR. Place the heel of one hand on the center of the chest, on the lower half of the breastbone. Put your other hand on top and interlock your fingers. Keep your arms straight and your shoulders directly over your hands. Push hard and fast.
Aim for at least 2 inches deep on an adult, and 100 to 120 compressions per minute. Let the chest fully recoil between compressions. Do not lean on the chest. The depth and rate matter because compressions pump blood to the brain and heart. If you stop, the blood flow stops.
Jennifer R. took her very first CPR class at our Plano location on K Avenue. She later wrote that the instructor greeted the class respectfully and politely from the first interaction through the end of the session. That first class is where people learn that good compressions are harder than they look. The PRESTAN manikins give real-time feedback on depth and rate, so students know immediately if they are pushing correctly.
Step 6: Give Rescue Breaths
After 30 compressions, give two rescue breaths. Keep the head tilted back. Pinch the nose shut, cover the person's mouth with yours, and blow for about one second. Watch for the chest to rise. If it rises, give a second breath. If it does not rise, reposition the head and try again.
Rescue breaths deliver oxygen to the lungs. But compressions are the priority. If you are untrained or uncomfortable giving breaths, hands-only CPR with continuous compressions is still effective. Our American Safety and Health Institute certified instructors teach both methods, and we let students practice breaths on manikins with disposable barrier devices.
Step 7: Continue CPR Until Help Arrives
Do not stop. Continue cycles of 30 compressions and 2 breaths until one of these things happens: an AED arrives and is ready to use, emergency responders take over, the person starts breathing normally, or you are too exhausted to continue. If an AED arrives, turn it on and follow the voice prompts.
Persistence is the difference between a person who survives and one who does not. CPR is physically demanding. If another trained person is nearby, switch every two minutes to keep compressions strong. AED training is included in all our CPR certification classes, because the machine and the compressions work together. The AED tells you what to do, but you have to keep doing the compressions.
Why Hands-On Practice Matters
Reading the 7 steps is not the same as performing them. CPR is a physical skill. The depth, the rate, the hand position, the airway angle. Those things live in your muscles, not your memory. That is why every class we teach is hands-on, with each student working on their own PRESTAN feedback manikin. No watching from the back. No sharing a manikin with a stranger.
The manikins measure compression depth and rate, so students get immediate feedback. That feedback is the difference between thinking you are doing it right and knowing you are doing it right. It is also why we keep classes small enough for individual attention.
Corin took the AHA BLS Provider course with instructor Linda and wrote that Linda explained everything backwards and forwards when it came to the information students really need to know. That is the standard we hold every instructor to. You should leave class able to perform the 7 steps of CPR on a real person, not just pass a written test.
Get Certified in CPR with Texas Heart CPR Training
If you need a certification card for work, school, or your own peace of mind, we can help. We are an American Heart Association Aligned Training Site and an American Safety and Health Institute training center. Our instructors have taught hands-on CPR classes across the Dallas-Fort Worth area since 2009.
We offer AHA BLS Provider, HeartSaver First Aid/CPR/AED, ASHI First Aid with CPR/AED, Pediatric First Aid/CPR/AED, ACLS, and PALS classes. Your eCard is emailed the same day you finish class and is valid for two years. We have training centers in Plano, Dallas, and Fort Worth, plus on-site classes at businesses, clinics, schools, and churches across 40+ surrounding cities.
If you are not sure which class you need, start with our guide to CPR certification online and what actually counts. Healthcare providers typically need AHA BLS. Teachers, coaches, construction crews, and daycare staff often need ASHI First Aid with CPR/AED for OSHA compliance. You can also schedule your class in DFW, review our PALS certification guide, or see our full course list.
Frequently asked questions
Can I learn CPR online?
You can learn the knowledge portion online, but not the hands-on skill. The American Heart Association offers online courses that cover the steps of CPR, and we offer the hands-on skills test afterward. You complete the online portion, then come to our Plano center for a skills session on a PRESTAN manikin. Your certification card is only valid once the hands-on portion is complete. This is the same standard healthcare employers require.
How often should I renew my CPR certification?
Every two years. Your eCard is valid for two years from the date you complete the class. We recommend scheduling your renewal a few weeks before it expires, especially if your employer tracks compliance. Many students come back to us for renewals, and some have returned for six years straight. You can renew with the same class or a shorter renewal course, depending on your certification level.
What's the difference between CPR and BLS?
CPR is the basic skill of compressions and rescue breaths. BLS, or Basic Life Support, is the healthcare-provider version that adds team dynamics, bag-mask ventilation, and AED use in a clinical setting. BLS is what nurses, EMTs, and other healthcare professionals need for work. CPR classes like HeartSaver are designed for workplace responders, teachers, coaches, and everyday people. Anyone can take BLS, but it is required for most healthcare roles.
Which CPR class do I need?
Healthcare providers need AHA BLS. Most others, such as teachers, coaches, construction crews, and daycare staff, need ASHI First Aid with CPR/AED for OSHA compliance. If you are not sure, check with your employer before you book. We work with facilities across DFW to make sure the card you earn is the card they accept. You can also review our guide to AHA BLS classes and same-day certification.
Before you decide
- Confirm which certification your employer or facility requires before you book.
- Check your current card's expiration date if you are renewing.
- Decide whether you need BLS, HeartSaver, ASHI, ACLS, or PALS.
- Consider whether you want hands-only CPR or full CPR with rescue breaths.
- Ask whether the class includes AED training. Ours always does.
- Plan for about three hours for a standard CPR or BLS class.
If you are ready to learn the 7 steps of CPR on a real manikin with an instructor watching your form, book your class now. Your eCard arrives the same day you finish.